Follow Me On Social Media!

Easy Ninja Creami Vanilla Ice Cream Recipe You’ll Love!
Introduction to Easy Ninja Creami Vanilla Ice Cream Recipe
There’s something undeniably magical about crafting your own indulgences, especially when it comes to using your Easy Ninja Creami Vanilla Ice Cream Recipe. Imagine a warm summer evening, the sun just setting, and you’re sitting out on the porch with a cold, creamy scoop of homemade vanilla ice cream in hand. It’s a moment of pure bliss, where each spoonful brings a smile and perhaps even a memory or two, like those joyful childhood days spent at the ice cream truck.
Creating your own ice cream not only allows for delightful customization, but it also fills your kitchen with the sweet aroma of vanilla. Plus, there’s a certain satisfaction that comes from serving up a treat you’ve made yourself, right from your Ninja Creami. Did you know that ice cream consumption peaks in the summer, with Americans consuming about 23 quarts of ice cream per person each year? That’s a lot of sweet treats!
With the Ninja Creami, whipping up your favorite flavors is as easy as pie—and let’s face it, who doesn’t love pie? The process is straightforward, allowing busy young professionals like you the joy and creativity of making ice cream without spending hours in the kitchen. You’ll find that with just a handful of ingredients, you can achieve an incredibly rich and creamy texture that rivals even the finest ice cream shops.
This Easy Ninja Creami Vanilla Ice Cream Recipe is perfect for any occasion, and it’s versatile. Want to throw in some chocolate chips or fresh fruit? Go for it! There’s nothing like making your own ice cream to give you a sense of accomplishment while creating lasting memories with family or friends. So grab your ingredients, fire up that Ninja Creami, and let’s get ready to indulge in a delightful frozen treat that will surely take your summer nights to the next level.

Key Ingredients for Easy Ninja Creami Vanilla Ice Cream Recipe
Creating the easy Ninja Creami vanilla ice cream recipe at home is not just about following a procedure; it’s about choosing the right ingredients that make every scoop a delightful treat.
Cream Cheese: This ingredient acts as the heart of the recipe, contributing to a rich, creamy texture that elevates the ice cream experience. It enhances both consistency and flavor, making every bite a joy.
Powdered Sugar: Unlike granulated sugar, powdered sugar dissolves seamlessly into your mixture, ensuring a perfectly smooth and sweet final product without any graininess. Trust me, this makes all the difference!
Milk: Opt for whole milk for the creaminess that we all crave in ice cream. Its higher fat content adds to that luscious mouthfeel, making each scoop feel indulgently rich.
Heavy Cream: This is the secret ingredient that brings the indulgence factor up a notch. The heavy cream creates a velvety texture and gives your ice cream that delightful, rich character.
Vanilla Extract: Always go for pure vanilla extract; it’s worth the investment. This ingredient lays down a natural, aromatic flavor that transforms your simple ingredients into something extraordinary.
Salt: A pinch of salt is the magical touch that amplifies and balances the flavors. It subtly enhances everything else, ensuring a well-rounded taste.
With these key ingredients, you’re well on your way to making the most delectable homemade vanilla ice cream!
Why You’ll Love This Recipe
Making homemade ice cream may seem like a daunting endeavor, but with this easy Ninja Creami vanilla ice cream recipe, you’ll discover just how simple and enjoyable it can be. As someone who once thought ice cream was best left to the professionals, I can’t emphasize enough how this recipe transformed my perspective. With just a handful of wholesome ingredients, you can whip up a delicious treat that rivals any gourmet shop.
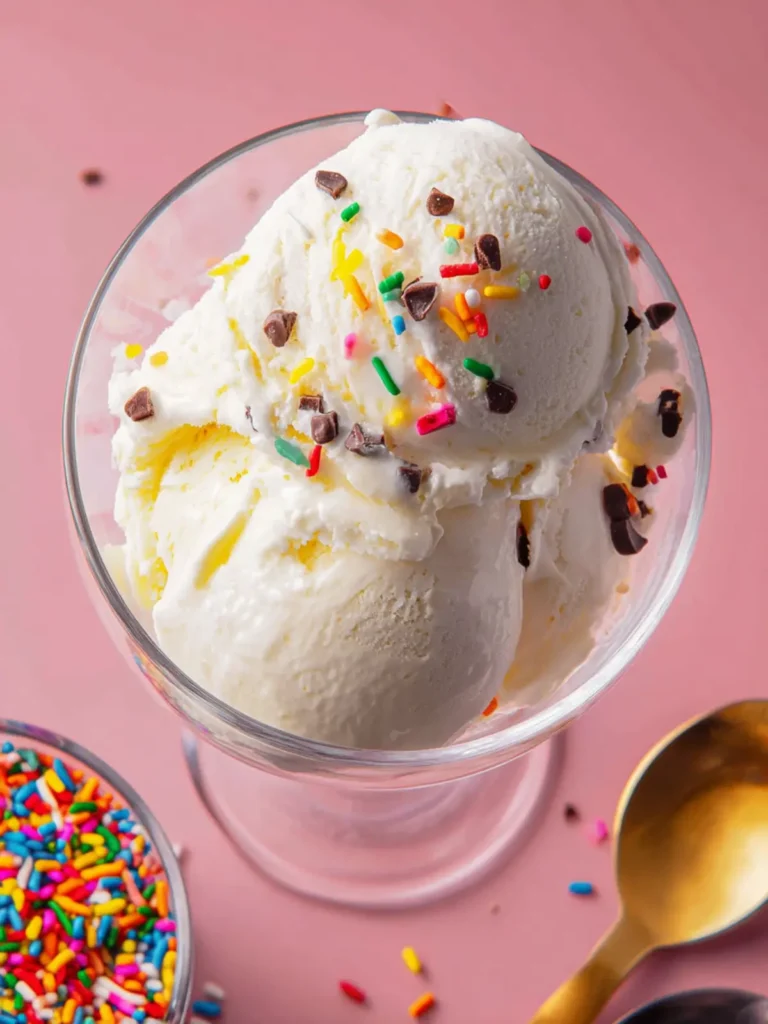
This recipe is all about creamy goodness and pure, simple flavors that delight your taste buds. Imagine cool, refreshing bites of classic vanilla ice cream on a hot summer day, or perhaps a cozy evening with friends, dishing out scoops topped with your favorite sauces and sprinkles. The best part? It’s incredibly customizable! You can easily tweak it with mix-ins or alternate flavors to suit your mood.
Not only is this ice cream easy to make, but it also allows you to avoid artificial additives and excess sugars found in store-bought options. Just picture yourself savoring every creamy spoonful, created in the comfort of your own kitchen. This recipe is not just about ice cream; it’s about making memories and enjoying moments with loved ones. You’ll love discovering how fulfilling it is to make your favorite treat from scratch—giving you the perfect excuse to indulge!

Variations to Try with Your Ice Cream
Creating an easy Ninja Creami vanilla ice cream recipe at home opens up a world of delicious possibilities. Want to take your ice cream experience to the next level? Here are some delightful variations to try!
Adding Chocolate Chips
There’s no denying the classic combination of vanilla and chocolate. Incorporating chocolate chips into your easy Ninja Creami vanilla ice cream elevates your treat with bursts of rich flavor. Just fold in semi-sweet or dark chocolate chips after blending your ingredients, and give it a gentle mix before freezing. The result? Creamy, chocolatey goodness in every bite.
Blending in Fresh Fruit
Why not infuse your ice cream with fresh fruit? Strawberries, raspberries, or bananas are excellent choices! Puree your fruit of choice and mix it into the base before churning. This not only brightens up the flavor but also adds a refreshing twist. If you like chunks, consider adding diced fruit for added texture and visual appeal—your ice cream will be as beautiful as it is tasty!
Swirling in Nut Butter
Imagine the creamy richness of nut butter swirled throughout your easy Ninja Creami vanilla ice cream recipe. Whether it’s smooth peanut butter, almond butter, or even sun butter, simply spoon in your favorite nut butter after the base has been blended. Then, use a knife to create delightful swirls. This will give your ice cream a nutty flavor and a satisfying, creamy texture.
Experiment with these variations to find your perfect scoop!
Cooking Tips and Notes
Creating the easy Ninja Creami vanilla ice cream recipe is all about the details, and a few key tips will ensure your batch is creamy, dreamy, and downright delicious.
The Importance of Room Temperature Ingredients
Starting with room temperature ingredients is essential for achieving that velvety texture in your ice cream. When the eggs, milk, and cream are at room temperature, they blend together more smoothly, preventing any lumps that could affect the final consistency. Plus, this ensures a better emulsification, meaning every scoop will be rich and creamy.
Why Freezing is Crucial
Freezing your ice cream base thoroughly is non-negotiable. After blending, pour the mixture into the Ninja Creami container and let it freeze for at least 24 hours. The longer freeze time allows the flavors to meld beautifully and results in a creamier texture. If you’re in a hurry, remember that shorter freezing can lead to icy chunks instead of that luxurious creaminess we all crave.
Tips for Using the Ninja Creami
When it comes to your easy Ninja Creami vanilla ice cream recipe, don’t rush the process. After the ice cream has frozen, allow the container to sit at room temperature for about 5-10 minutes before processing. This makes it easier for the blades to carve through and gives you smooth scoops. Also, if you find your ice cream is a little too hard, consider running a quick “re-spin” cycle in your Ninja Creami. It’ll whip it back into a soft, scoopable consistency without sacrificing quality!

Serving Suggestions for Your Ice Cream
Indulging in the easy Ninja Creami vanilla ice cream recipe opens a world of delightful serving possibilities. This creamy treat can be more than just a scoop in a bowl; it can elevate your dessert game to new heights.
Perfect Pairings with Desserts
Pairing your homemade vanilla ice cream with complimentary desserts can create a masterpiece. Consider serving it alongside:
- Warm Brownies: The contrast of hot and cold is always a winner.
- Homemade Cookies: Grab some chocolate chip cookies and make classic ice cream sandwiches.
- Fruit Crumbles: A scoop of ice cream enhances the fruity flavors and adds a creamy element to the dish.
Fun Ways to Serve Guests
Want to impress your friends? Try these unique serving ideas:
- Ice Cream Bar: Set up a DIY station with scoops of your vanilla ice cream and let guests choose their toppings.
- Milkshakes: Blend your ice cream with a splash of milk for a thick, creamy milkshake perfect for sipping.
- Affogato: Pour a shot of hot espresso over a scoop of ice cream for a delightful Italian treat.
Creative Toppings
The right toppings can take your easy Ninja Creami vanilla ice cream recipe to the next level. Consider:
- Honey or Maple Syrup: A drizzle adds a touch of sweetness.
- Nuts: Chopped almonds or walnuts provide crunch and a nutty flavor.
- Fruit Compotes: Warm fruit sauces, like raspberry or blueberry, can add a zesty kick.
With these suggestions, your easy Ninja Creami vanilla ice cream can become a star player at any gathering!
Time Breakdown for Making Ice Cream
Creating your own Easy Ninja Creami Vanilla Ice Cream at home is not only a delightful experience but surprisingly simple. By understanding how long each step takes, you can set yourself up for a perfect treat on a warm day or for a cozy night at home.
Preparation time
Getting started with your ice cream involves about 10 minutes of preparation. This includes gathering your ingredients like milk, cream, sugar, and vanilla, and mixing them together. Make sure to give yourself a moment to savor the anticipation as your mixture comes together!
Freezing time
Once you’ve prepared your base for the easy ninja creami vanilla ice cream recipe, it’s time for the mixture to chill. Ideally, let it freeze for at least 24 hours. This helps the flavors deepen and the ice cream achieve that perfectly creamy texture.
Mixing time
After the waiting game, it’s time for the magic! Blending your frozen mixture in the Ninja Creami will take around 2-3 minutes. You’ll watch as it transforms into smooth and luscious ice cream, ready to delight your taste buds. Don’t forget to sample a bit as you go; it’s a rewarding experience!
Nutritional Facts for Easy Ninja Creami Vanilla Ice Cream
Creating a delicious batch of easy Ninja Creami vanilla ice cream not only satisfies your sweet tooth but also provides a variety of nutritional benefits. Let’s break down the key aspects of this delightful treat.
Calories
A typical serving of this creamy ice cream contains around 120 calories. This is a satisfying option for those enjoying a dessert while keeping an eye on their caloric intake.
Sugar Content
With approximately 15 grams of sugar per serving, the sweetness comes from natural ingredients, making it a more wholesome choice compared to many store-bought alternatives.
Fat Content
This easy Ninja Creami vanilla ice cream recipe offers about 6 grams of fat per serving. The creamy texture we all love comes from healthy sources, allowing for a rich taste without feeling overly indulgent.
Now you can enjoy your homemade vanilla ice cream knowing just how it fits into your nutritional goals!
FAQ about Easy Ninja Creami Vanilla Ice Cream
The Easy Ninja Creami Vanilla Ice Cream recipe opens up delightful possibilities for both ice cream enthusiasts and casual dessert lovers alike. As you prepare this creamy, dreamy treat, questions may naturally arise. Here’s a handy FAQ section to help you navigate any uncertainties!
Can I make this recipe dairy-free?
Absolutely! Transforming this easy Ninja Creami vanilla ice cream recipe into a dairy-free delight is simple. Substitute the heavy cream with full-fat coconut milk or any dairy-free cream alternative, which will also keep it rich and creamy. You can use a dairy-free milk like almond, oat, or soy for the milk part. Just make sure to check that your vanilla extract is also dairy-free!
How can I store leftover ice cream?
If you happen to have any leftovers (which can be a rarity!), storing your ice cream properly is key to maintaining its delightful texture. Transfer the ice cream into an airtight container, ensuring it’s well-sealed to prevent freezer burn. It’s best consumed within two weeks, but it’ll likely be gone long before that! When you’re ready to enjoy more, just give it a few minutes outside the freezer to soften slightly for easier scooping.
What’s the best way to serve ice cream?
Presentation can elevate your homemade ice cream experience! Scoop your easy Ninja Creami vanilla ice cream recipe into elegant bowls or cones and drizzle with toppings like chocolate sauce, fresh fruit, or nuts. For a special touch, consider serving it alongside warm desserts like brownies or apple pie to create a delicious contrast in temperatures. Enjoy each scoop as you savor the sweet rewards of your hard work!
Conclusion on Easy Ninja Creami Vanilla Ice Cream Recipe
Creating your own delicious ice cream at home with this easy Ninja Creami vanilla ice cream recipe can be a delightful experience. The creamy texture and rich flavor are perfect for warm weekends or special occasions to impress family and friends. By using simple ingredients like cream, milk, and high-quality vanilla, you’re not just indulging in a treat; you’re crafting a little moment of joy. Embrace the freedom to customize your flavors and enjoy the satisfaction that comes with making something special from scratch. In just a few steps, you can elevate your dessert game and create memories in the process!
Print
Ninja Creami Ice Cream
- Total Time: 1 day 10 minutes
- Yield: 4 servings 1x
- Diet: Vegetarian
Description
Delicious homemade ice cream prepared using the Ninja Creami.
Ingredients
Scale
- 1 Tbsp Cream Cheese, Room Temperature
- 1/3 Cup Powdered Sugar
- 1 Cup Milk
- 3/4 Cup Heavy Cream
- 1 tsp Vanilla Extract
- 1/8 tsp Salt
Instructions
- In a large mixing bowl, add the cream cheese and warm it up in the microwave for about 10 seconds.
- Mix in the powdered sugar.
- Add the milk, cream, vanilla, and salt. Whisk all ingredients together.
- Pour the mixture into the Creami pint and cover it with the lid.
- Place in the freezer on a flat surface for 24 hours.
- Place the frozen pint, uncovered into the outer bowl of the Ninja Creami.
- Place the mixing paddle on and secure it to the bowl.
- Lock the bowl in place.
- Select ICE CREAM function.
- Once mixed, serve or freeze for later.
- If you prefer soft serve, add about a tablespoon of milk to the pint and run again on ice cream function.
Notes
- For extra creaminess, ensure all dairy ingredients are at room temperature before mixing.
- Store leftover ice cream in the freezer for up to 2 weeks.
- Prep Time: 10 minutes
- Cook Time: 1 day
- Category: Dessert
- Method: Freezing
- Cuisine: American
Nutrition
- Serving Size: 1 cup
- Calories: 250
- Sugar: 20g
- Sodium: 50mg
- Fat: 15g
- Saturated Fat: 9g
- Unsaturated Fat: 4g
- Trans Fat: 0g
- Carbohydrates: 30g
- Fiber: 0g
- Protein: 2g
- Cholesterol: 45mg